

How to Patch Test Sensitive Skin Safely
Last Updated: October 27, 2026
Quick Summary
To patch test sensitive skin, apply a small amount of product to your inner wrist, inside of your elbow, or back of your upper arm in the morning, then check for redness, itching, swelling, or rash the next morning. Repeat the application on day two and monitor for 48 hours or longer to ensure the product is safe before using it on your face or body.
- Apply product on day one morning and check day one evening and day two morning
- Look for redness, itching, swelling, rash, or skin feeling hot and tight
- Test on inner wrist, inside of elbow, or back of upper arm, never on face or broken skin
- If no reaction appears after 48 hours, start using the product every other day for one week
- Document what you observe each time you check the test area
Table of Contents
- What Patch Testing Is and Why It Matters for Sensitive Skin
- Where to Patch Test Skincare Products
- How Long to Patch Test Skincare and What to Monitor
- Recognizing Skincare Patch Test Reaction Symptoms
- Step-by-Step: How to Test Skincare Products Before Using Them
- Common Mistakes to Avoid When Patch Testing
- Medical Patch Testing vs. At-Home Cosmetic Testing
- Start Your Skincare Journey with Confidence
- Frequently Asked Questions
What Patch Testing Is and Why It Matters for Sensitive Skin
A patch test sensitive skin method is a simple way to check if your skin will react badly to a new skincare product before you use it all over your face or body. You apply a small amount of the product to a small area of skin, wait a set number of days, and watch for signs of irritation or allergic reaction.
If you have sensitive skin, patch testing can help you observe how a product affects a small area before using it more widely.
The difference between a patch test and a full allergic reaction test matters. At-home patch testing for cosmetics and skincare products is what we cover here. Medical allergy patch testing, done by a dermatologist, uses standardized allergens and takes much longer. Both serve different purposes, and understanding that difference helps you know when to test at home and when to see a doctor.
Where to Patch Test Skincare Products
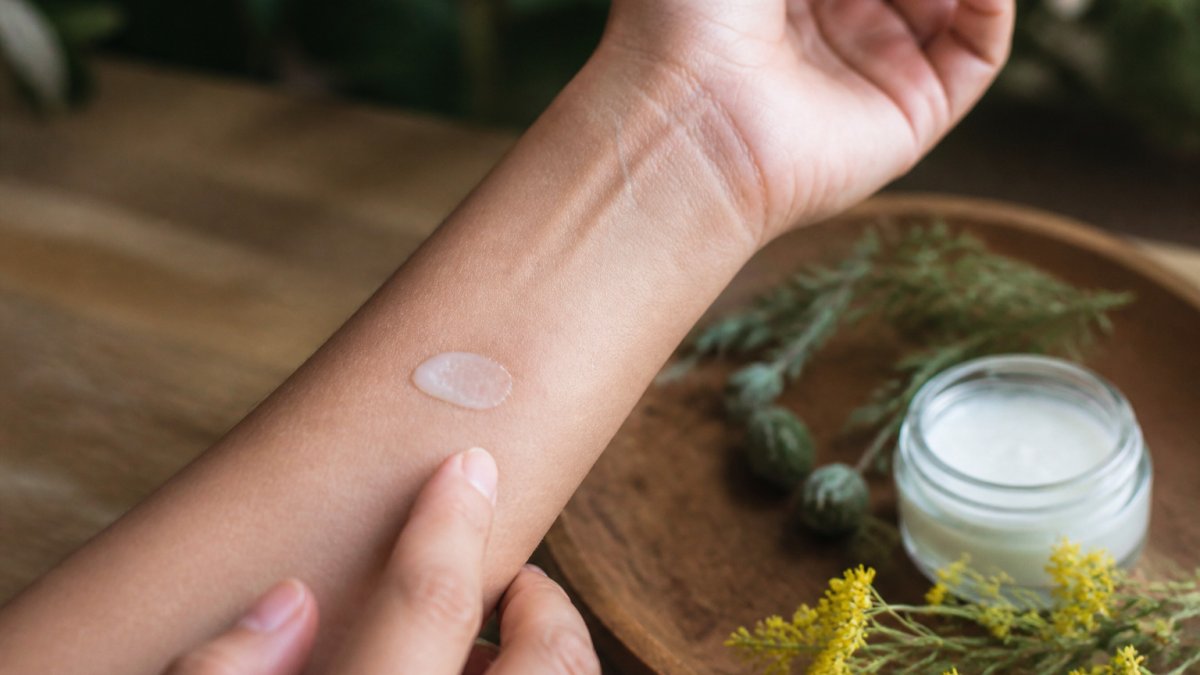
The best spots for patch testing are areas where your skin is sensitive but not so visible that a reaction would be obvious in public. Your inner wrist, inside of your elbow, and the back of your upper arm are ideal test sites.
The inner wrist and inside of the elbow are possible test sites.
The back of your upper arm is another possible test site. Pick whichever spot feels most comfortable for you to monitor.
Avoid testing on your face, neck, or chest during the initial patch test phase. These areas are more delicate and visible. Save those zones for later, once you've confirmed the product is safe on less sensitive skin. Never test on broken skin, sunburned areas, or skin that's already irritated.
How Long to Patch Test Skincare and What to Monitor
Apply the product in the morning, leave it on throughout the day, and check it again the next morning. Then apply it again that second day and check the following morning.
Some reactions may appear after 48 hours. If you want to observe the area for longer, check it on day three as well.
During your monitoring period, check the test area. Look for redness, itching, swelling, a rash, or any change in how the skin feels. Write down what you see.
Keep the test area clean and dry. Don't cover it with tight clothing or bandages unless the product instructions specifically call for that. If itching becomes unbearable or swelling spreads beyond the test site, remove the product immediately and rinse the area with cool water.
Recognizing Skincare Patch Test Reaction Symptoms
Redness, itching, a rash, swelling, or inflammation may appear at a test site. The skin may feel hot, tight, or uncomfortable. Some people see small bumps or blistering.
Mild redness alone does not establish whether you can use a product. Observe whether it persists, worsens, or occurs with itching and swelling.
If the test area itches or swelling spreads beyond it, stop using the product and observe the area.
A rash may appear during the test window. Don't ignore changes in your skin.
If the test area looks and feels normal after you have observed it, that does not establish how the product will affect other areas. Use caution when introducing a product.
Step-by-Step: How to Test Skincare Products Before Using Them
What You'll Need
- The skincare product you want to test
- A clean test area (inner wrist, inside of elbow, or back of upper arm)
- Mild soap or cleanser to prep the skin
- A clean towel or paper towel
- A notebook or phone to record what you see
- Optional: a ruler to measure any rash or swelling
The Testing Process
Day 1, Morning: Wash the test area with mild soap and warm water. Pat it dry completely. Apply a small amount of the product. Leave it on and go about your day.
Day 1, Evening: Check the test area. Look for redness, itching, swelling, or any change. Write down what you see, even if nothing has changed. If you see a strong reaction, remove the product with cool water and stop the test.
Day 2, Morning: Check the test area again before you wash. Apply another small amount of the product to the same spot. Leave it on throughout the day.
Day 2, Evening: Check again. Record any changes.
Day 3 (Optional): Check the test area one more time.
After the Test: If you see no redness, itching, rash, or swelling, you can start using the product on your face or body. Begin with a small amount and use it every other day for the first week. Watch for any delayed reactions. If your skin stays clear and feels good, you can increase to daily use.
Common Mistakes to Avoid When Patch Testing
Testing too much product at once. People often apply the same amount they'd use on their face to the test area. You only need a small amount.
Testing multiple products at the same time. If you apply multiple new products to different areas of your arm and notice a change, it may be difficult to tell which product is associated with it.
Skipping the second application. This article does not establish how many applications or how long a test needs to be.
Testing on your face right away. A result on one area does not establish how a product will affect another area.
Ignoring mild symptoms. Observe changes such as redness or itching, and seek professional advice if you are concerned.
Not documenting what you see. Your memory isn't reliable after a few days. Take a photo of the test area or write down exactly what you see each time you check. This record helps you spot patterns and gives you information to share with a dermatologist if needed.
Medical Patch Testing vs. At-Home Cosmetic Testing
Medical patch testing is performed by a dermatologist. Ask a dermatologist about the procedure and what it can identify.
At-home patch testing involves applying the product you want to use. It does not establish which ingredient may be associated with a reaction.
Ask a dermatologist whether medical patch testing is appropriate for your situation and what it can determine.
At-home testing involves trying a product on a small area before using it more widely. It cannot guarantee that a product will not cause a reaction.
Medical and at-home testing are different. An at-home test does not establish that a product is safe for you or identify a specific trigger.
Start Your Skincare Journey with Confidence
Observing a small area before using a new skincare product more widely takes patience.
At Elegance by LadyKath: Beans & Botanicals, our Sensitive Skin Face Body Cleanser has a minimalist formula and is described as gentle on the skin. Before adding any new product to your routine, consider how it affects your skin.
Explore our Skincare collection. Learn how to build a gentle daily routine.
Start small, observe carefully, and note how your skin responds.
Patch testing sensitive skin doesn't have to be complicated. Observe the area and note any changes. A test result does not establish that a product is suitable for continued use.
American Academy of Dermatology guidance on patch testing and contact dermatitis
FDA information on cosmetic ingredients and skin reactions
Mayo Clinic overview of allergic contact dermatitis symptoms and testing
| Test Phase | Duration | What to Watch | Action |
|---|---|---|---|
| Day 1 Morning | Apply product | Initial skin response | Record observations |
| Day 1 Evening | 12 hours | Redness, itching | Note any changes |
| Day 2 Morning | 24 hours | Rash, swelling | Reapply if clear |
| Day 2 Evening | 36 hours | Delayed reactions | Document findings |
| Day 3 (Optional) | 48-72 hours | Persistent symptoms | Confirm safety |
Frequently Asked Questions
How do you patch test a skincare product on sensitive skin?
Apply a small amount of the product to a test area and observe the skin for any changes. A test result does not establish that the product is safe to use on larger areas of your face or body.
What should you do if a patch test causes redness or itching?
If you notice redness or itching, stop using the product and rinse the test area with cool water. Avoid scratching. Consult a dermatologist if you are concerned about the reaction.
Can you patch test a product if you have sensitive skin?
Patch testing involves observing how a product affects a small area before using it more widely. A test cannot establish that a product will not cause a reaction elsewhere or identify a specific allergen.
How long should you wait after patch testing a skincare product?
A test result does not establish that a product is safe to use. Consult a dermatologist if you have questions about testing or a reaction.
